Ask the Chef: Why Can't I Get Meringue Right, Plus Bonus Materials!
Carrie H
This month's question comes from Amy Sherman from Cooking With Amy, who wants to know why she can't seem to get her meringue just right.
My nemesis is meringue. How do I determine exactly the right time to stop beating the egg whites? I typically overbeat my egg whites. I know what that looks like! Overbeaten egg whites do not make good meringues.
Once again, we turn to Matthew Robinson, chef, food scientist and food industry veteran and the man behind the Culinary Exchange. He's gone out of his way this time, with these great photos, a recipe and a video. (Ladies and Gentlemen, we also have our FIRST video on the Dharma Kitchen!) Here's his response:
Ahh…meringues! Puffy little clouds of crunchy sweet goodness are a tasty treat. The pleasure of dried egg whites and sugar knows no bounds. And there are a lot of great applications for meringue so it is good to know how to make them right. (DK NOTE: Pssst! These make great food gifts to pack and mail to people during the holidays!)
Over whipping is probably the biggest risk with meringues—that and fat contamination, with more on that later. So how do we avoid over whipping? Well, truth be known, we don’t know precisely how to avoid it. There is no magic algorithm or set of measures we could make in the kitchen that would help us recognize when the egg whites are just about to give in to too much whisking and become a big, unstable, foamy mess. But with some practice, we can learn to recognize when the egg whites are whipped enough just by looking at them. We can also make sure we are using some ingredients that help make the foam as stable as possible.
You probably know all the basics of meringue making, but 4 critical tips are as follows:
· Use extremely clean bowls and beaters; any speck of fat will make your foam it go flat.
· Crack and separate the eggs carefully so no egg yolk (this is fat) gets in to the whites.
· Use room temperature eggs that are as fresh as possible. These foam best.
· Use powdered sugar. Powdered sugar helps stabilize the foam.
I know, all the folks out there are saying “what about the bowl being copper?” That is nice to have and if your kitchen is blessed with a copper bowl, then certainly put it to use as this will help stabilize your foam. If not, no worries! For those mere mortals with no copper, myself included, we can either use a dash of cream of tartar, which mimics the copper bowl reaction, or just not worry about it. The cream of tartar is optional. Eggs under the duress of a whisk or mixer will foam, no copper or cream of tartar needed. This is the 5th law of thermodynamics after that equal and opposite reaction law, you know....
An obvious way to help make sure we don’t overbeat the meringues is to check often on the progress. More power to you if you actually use a whisk for this—those forearms should be in the next issue of Muscle and Fitness magazine!

Start your engines!
Start beating the egg whites on medium high speed. When the egg white is foamy and frothy, add the optional cream of tartar.

Look for the foamy bubbles...
As we continue to whisk, our inner chef should be on alert looking for a foam where the egg whites are still a little foamy, but the bubbles are getting smaller and when the beaters or whisk is lifted, a really weak peak can be formed. Any trail that's left almost fades away on its own.
It is now time to start supporting the foam by adding the sugar, 1 tablespoon or heaping teaspoon at a time, whipping as we go until all the sugar is incorporated. The foam will start to become more dense, creamy, and satiny/shiny looking. The bubbles will become very tiny and difficult to see.

Look! A stalactite and stalagmite of meringue—or, the soft peak meringue stage.
When you reach this stage, stop and see what kind of peaks can be formed. When the whisk or beaters are lifted, and a nice peak that droops over is formed, you are still at the soft peak stage. However, it is stiff peaks we want, so keep on whipping.

This is so perfect. Don't you want to just jump right in and make a meringue splash?
After whipping a bit more, our inner chef will note a small change in the thickness of the ripples. Check! Check! Check! When you lift your whisk or beaters, the meringue will keep its dense, creamy, shiny look and the foam will form peaks that stand stiffly on their own. When this happens, put the whipping apparatus down, take a deep breath and step away from the bowl!
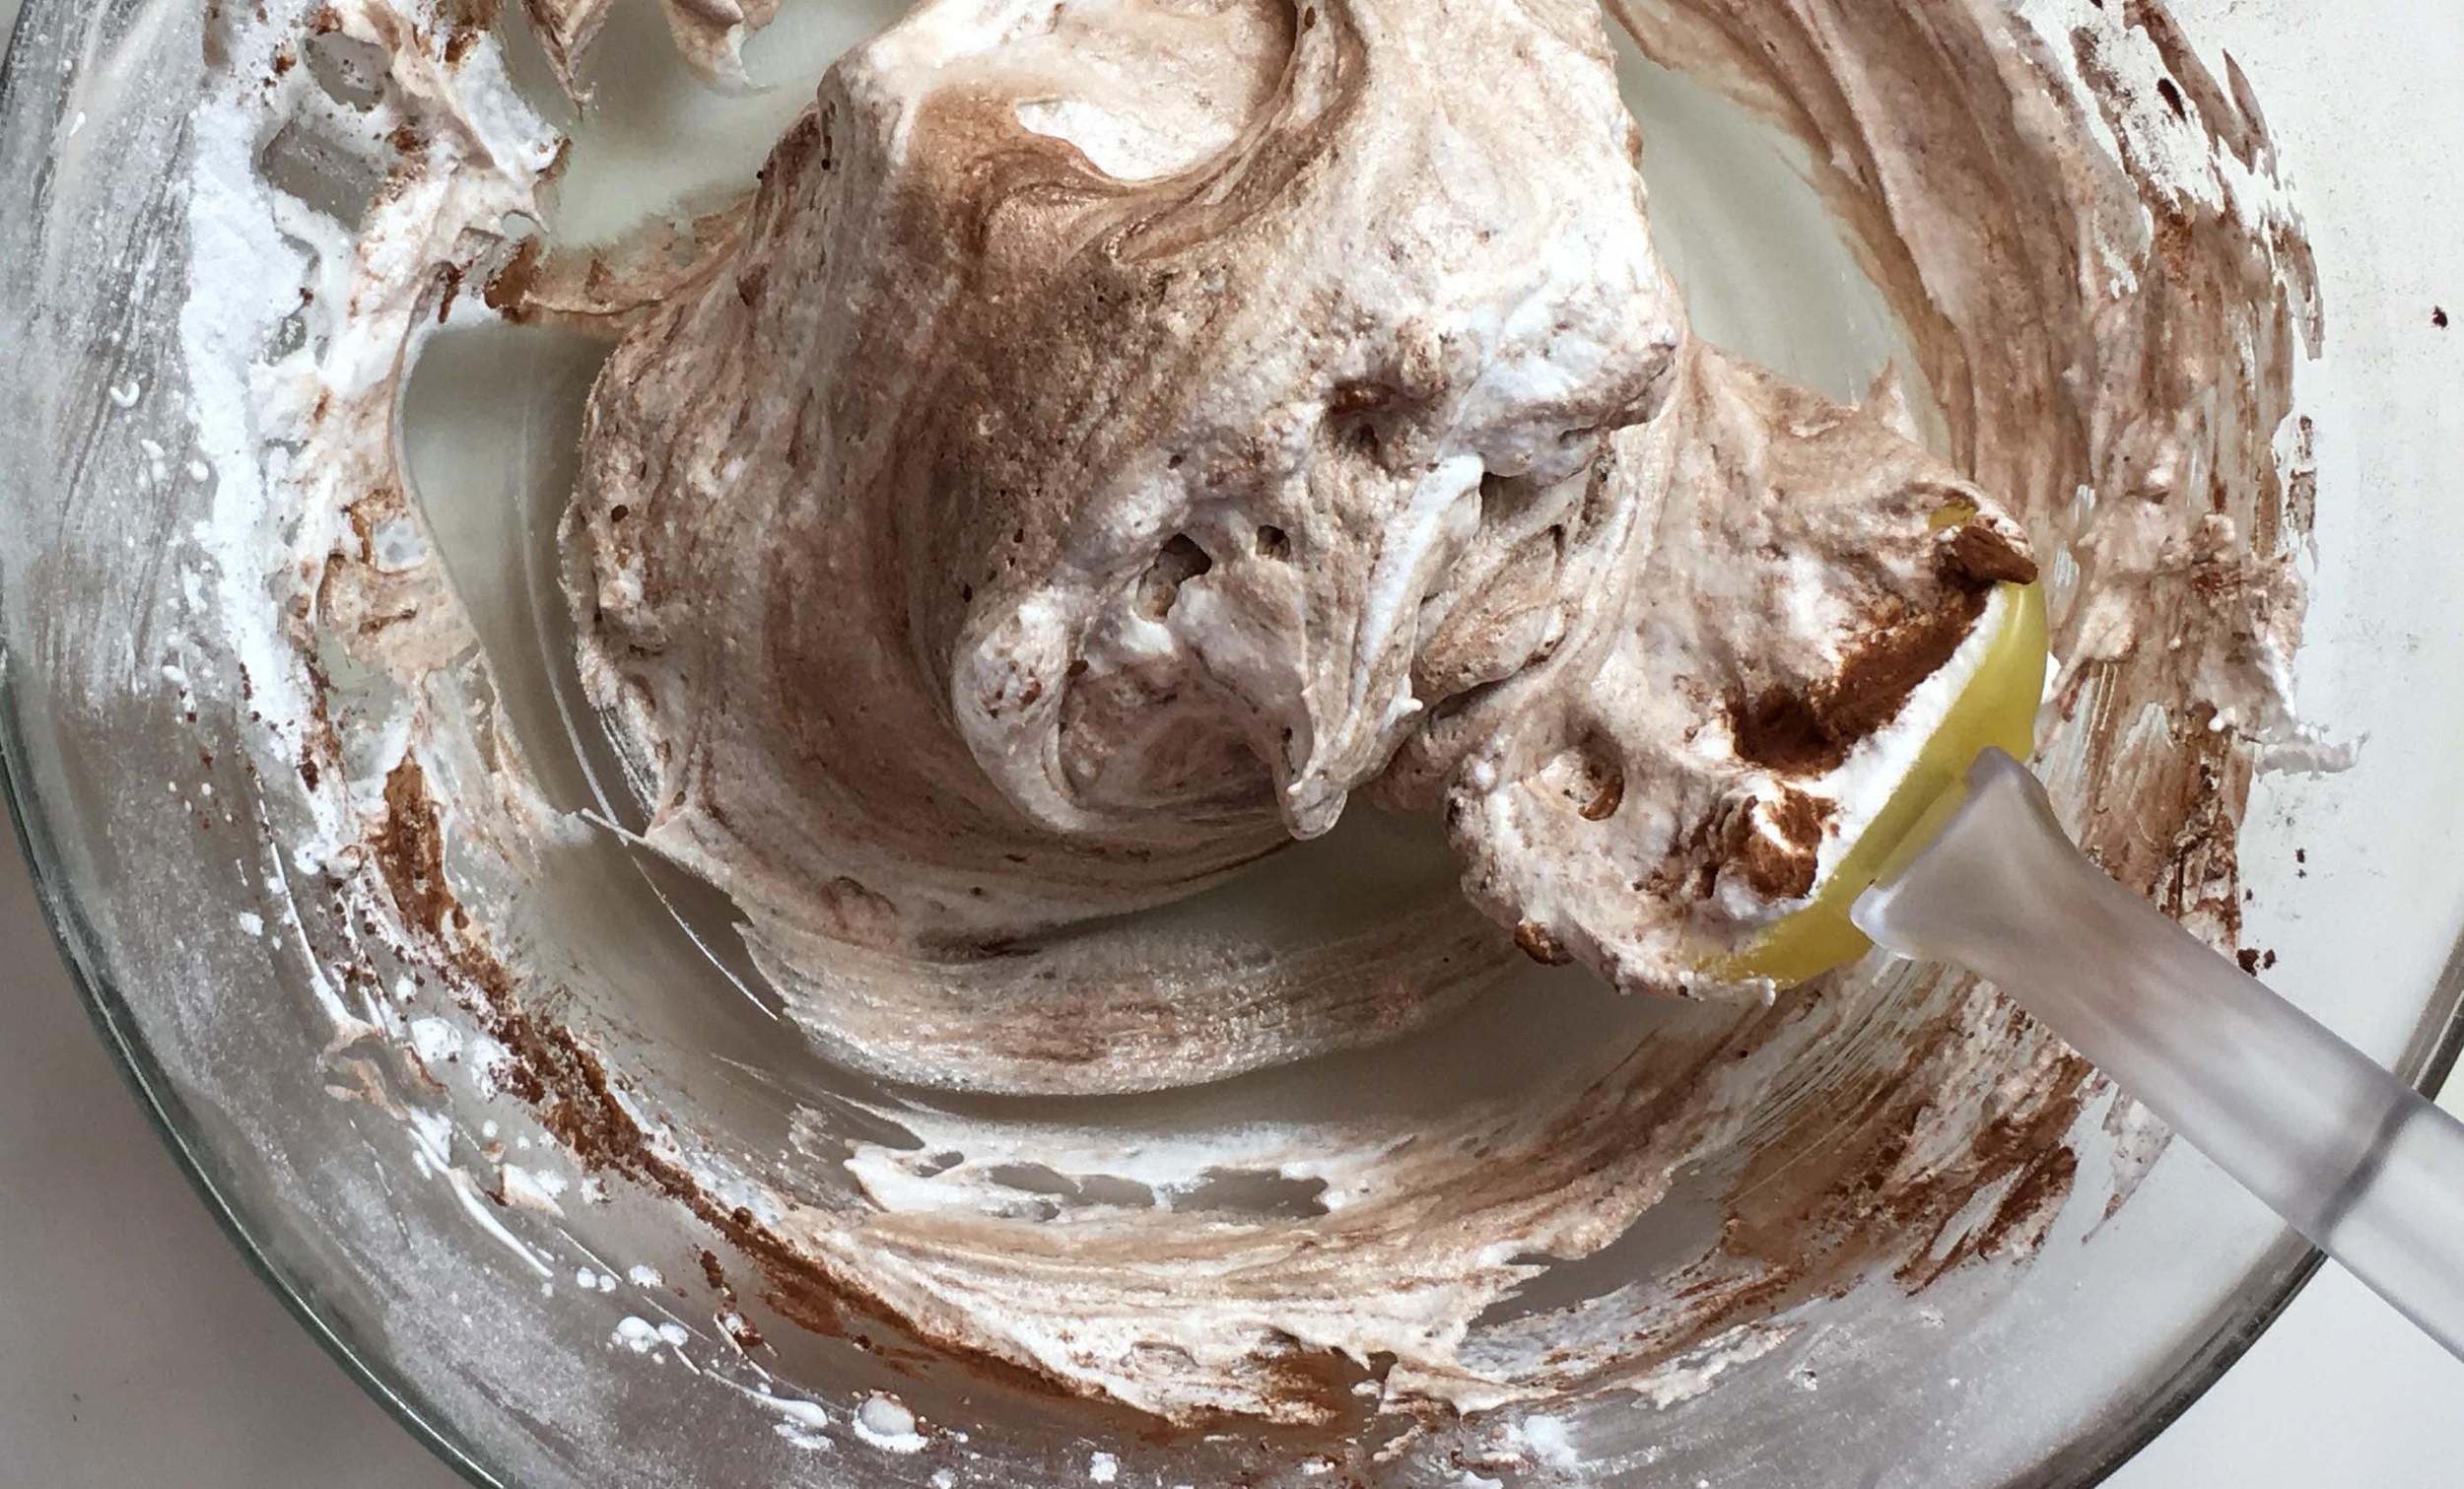
Cocoa powder, gently folded in, getting ready for low-oven meringue cookie action.
If there are some other mix-ins, such as cocoa powder, chocolate chips or nuts, we reduce our risk of over whipping the meringue by folding in the rest of the ingredients instead of whipping. You really wouldn’t whisk in additions like nuts anyway, so folding makes sense. With the act of folding we might risk loss of some volume, but the whole project will not be lost due to over beaten egg whites. We can then proceed to piping or spooning the meringues into desired shapes and baking them into perfect clouds of crunchy sweetness! Meringues are then baked in a low temperature oven, between 200°F to 300°F for about 1 to 1.5 hours until the outside is crispy and the meringues release easily from the parchment paper used to line the baking tray.
For your enjoyment, here is a recipe for crunchy chocolate and vanilla meringue cookies. If you only want vanilla, omit the cocoa powder. If you want only chocolate, double the cocoa powder.
Crunchy Vanilla and Chocolate Meringue Cookies
Ingredients
- 3 eggs at room temperature
- 1 tsp. vanilla extract
- 2/3 cup powdered sugar
- 2 tsp. cocoa powder
Instructions
Preheat the oven to 300°F.
Using two very clean bowls, separate the eggs by first cracking them on a flat surface, opening the egg and passing the egg back and forth from shell half to shell half until all the egg white falls into one of the bowls. Pour that egg white into large clean bowl. Place the egg yolk in the other bowl and repeat separating all the eggs making sure no yolk contaminates the egg whites, as the fat from yolk will hinder the egg whites from whipping well.
Begin whipping the egg whites with a hand mixer or balloon whisk, making sure the beaters or whisk are very clean. Whip the egg whites until foamy, about 1 minute.
When the egg whites are frothy and opaque, add the vanilla and continue whipping until a really weak peak can be formed when the beaters or whisk are lifted, and any trail fades away on its own.
Add 1 T. of the sugar at a time while whisking until the egg whites are dense, creamy looking, and shiny. The egg whites should hold a stiff peak and not fold over on themselves. Check progress as you go so as not to over whip.
Move half of the meringue mixture to a separate large bowl or piping bag fitted with a star tip. Gently fold the cocoa powder into the remaining meringue until it is just incorporated, being careful not to deflate the meringues too much. (If you're using piping bags, transfer the chocolate meringue to another piping bag.)
Line a baking tray or cookie sheet with a piece of parchment paper. Spoon or pipe the meringue mixture about a tablespoon at a time.
Bake the meringues for about 1 -1-1/4 hours or until the meringues are crispy on the outside and release form the parchment easily.
Let cool and serve.
If there are left overs, store them in an air-tight container. Meringues are what is called hygroscopic, which means that they take on water from the air. Therefore, they will end up soggy and sticky if left uncovered.
Want more? Here's Chef Matthew giving us a step by step video.